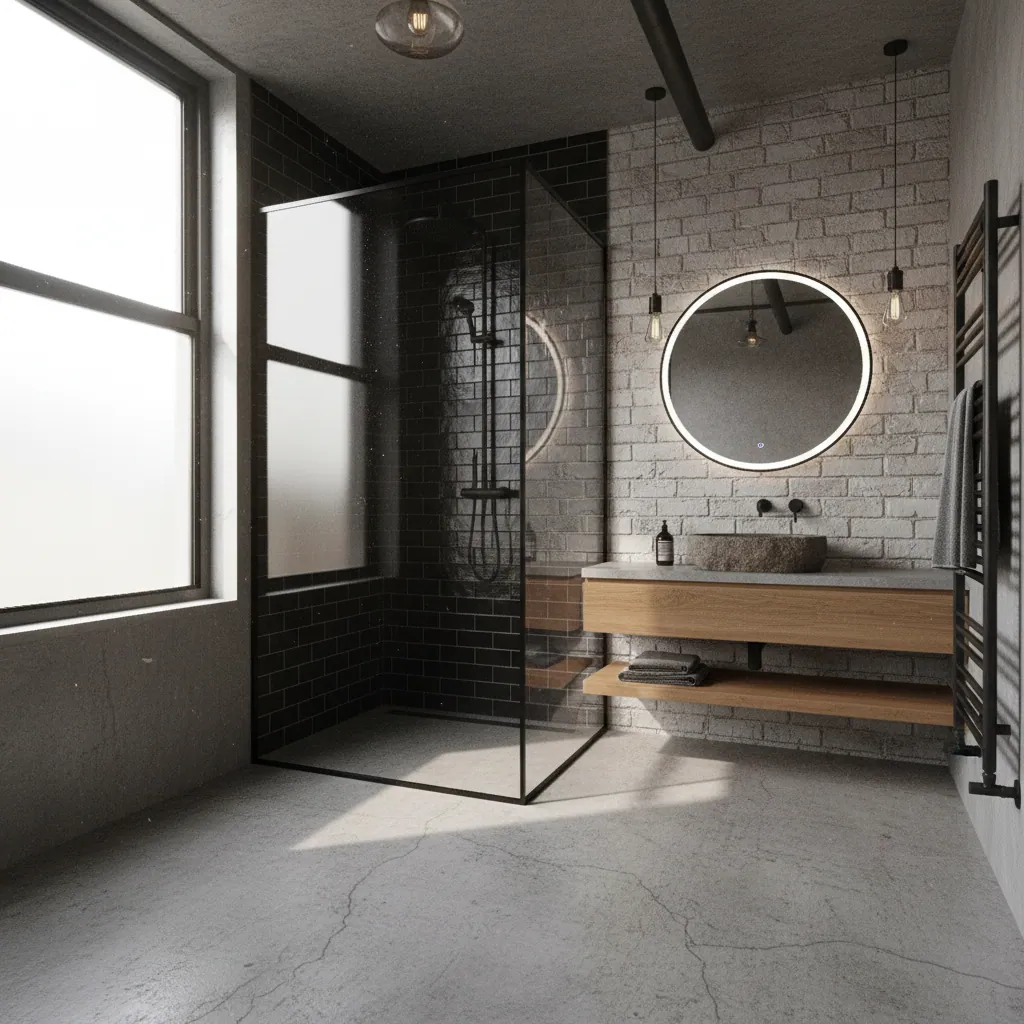
Wet room screens & glazing
In a wet room there’s no shower door and no enclosure — just, usually, a single pane of glass. That one fixed screen does a surprising amount of work: it keeps the spray off your WC, your basin and your towels, it defines the shower zone without closing it in, and it does all of it with nothing to catch, drip or clog. Choose the glass well and position it around how you actually use the room, and it disappears into the design. Choose it badly and you’re forever squeegeeing green-tinted glass or mopping a wet floor by the door. This guide covers the choices that matter — frameless or framed, standard or low-iron, where to put it, and how it’s fixed safely into a tanked wall.
What a wet room screen actually does
People sometimes ask whether they need a screen at all — after all, the whole floor is waterproof, so surely a bit of stray water doesn’t matter? Technically no, you don’t strictly need one. But almost everyone chooses one, and for good reason. A wet room without any screen means spray travelling further than you’d like: onto the toilet seat, across the basin, over the towels on the rail and, in a smaller room, right up to the door. A single fixed glass panel catches the bulk of that spray at source, so the rest of the room stays dry, warm and pleasant to walk into. The floor still falls to the drain and dries itself, but the screen means it has far less to deal with.
The beauty of the wet room approach is that this is a fixed screen, not a door. There’s no runner track to fill with grime, no hinge to seize, no rubber seal to go black and no folding mechanism to fight with. That single decision — glass instead of an enclosure — is a big part of why a well-built wet room is one of the easiest bathrooms to keep clean, and it pairs naturally with the level-access, tray-free floor described on our wet room installation hub.

Safety glass, always
Every wet room screen we fit is toughened safety glass as standard — typically 8mm or 10mm depending on the size of the panel and how it’s supported. Toughened glass is several times stronger than ordinary glass and, in the rare event it does break, it crumbles into small blunt granules rather than dangerous shards. It’s not an upgrade or an optional extra; it’s simply how a bathroom glass panel should be made, and it’s what keeps a screen safe in a busy family bathroom for the long term.
Frameless, framed or low-iron — choosing the glass
There isn’t one right screen for every wet room. The best choice depends on the size of the panel, the look you’re after and, honestly, the budget. Here are the options we fit most often, and where each one earns its place.
Frameless
A single pane fixed with minimal, discreet brackets and no surrounding frame. It gives the cleanest, most open, hotel-style look — the eye runs straight through it — and there’s almost nothing for limescale and grime to collect on. It’s the most requested option for modern wet rooms, and usually the dearest, because the glass is thicker and the fixings have to do more work.
Framed & semi-framed
A slim metal frame around some or all of the panel. It’s a touch more traditional in appearance, but the frame adds rigidity, which can mean a slightly thinner (and more affordable) pane while still feeling reassuringly solid. A sensible, cost-effective choice, and the frame can be matched to your brassware — black, brushed brass or chrome.
Low-iron glass
Standard glass has a faint green tint you notice most at the edges and over larger panels. Low-iron glass strips most of that out, so it reads as genuinely clear and lets the true colour of your tiles show through. It’s an upgrade on either a frameless or framed screen, and on a big panel it’s the difference people notice most once it’s in.
Whichever glass you choose, the sizing and positioning matter more than the specification. A screen that’s too short lets spray past its end; one that’s too long makes a small room feel cramped and awkward to walk past. We size the panel around the shower head position, the fall of the floor and the natural walk-in line, so it stops the water without stealing space. If you’d like the clearest, brightest finish, low-iron on a frameless panel is the combination we’d point you to — but we’ll always give you the honest trade-off against cost.
Sizing, position and the walk-in gap
Getting the screen right is as much about geometry as glass. The panel has to hold back the spray while leaving a comfortable, unobstructed way in and out — and in a wet room, where there’s no door to define the opening, that walk-in gap is a judgement made on site.
Positioning around how you use the room
We start with the drain and the falls. The shower head throws water in a predictable direction, the floor is graded to carry it back to the drain, and the screen goes where it intercepts the most spray before it can reach the WC, basin and towels. That usually means a panel running out from the wall alongside the showering zone, sized so a person of any height showering inside it keeps the water on the right side of the glass. It’s planned around the way you actually stand and move, not dropped in as an afterthought.
The walk-in gap and a return panel
The gap you step through wants to be generous enough to feel open and easy — especially if the wet room is there for accessibility — but not so wide that spray escapes past the end of the screen. Where a room is short on wall to protect a nearby door or basin, a small hinged return panel at the end of the fixed screen folds the protection round the corner without adding a full enclosure. It’s the one part of the glass that moves, and it earns its keep in tighter layouts.
Small wet rooms are where screen choice really counts, because every centimetre is doing double duty. A single, well-placed fixed panel can protect the rest of a compact room without boxing it in — and sometimes a shorter screen with a smart layout beats a big one. We go into the specifics on our small wet room design guide. The floor finish plays its part too: a slip-resistant floor keeps the walk-in area safe underfoot, which matters most right where you step past the glass — see our slip-resistant flooring page for how we specify it.
Fixing glass into a tanked, tiled wall
This is the detail that separates a screen that lasts from one that becomes a slow leak, and it’s exactly where a wet room specialist differs from a general fitter. A fixed screen has to be bolted firmly into the wall — but that wall is tanked and tiled, and every fixing you drive into it is a hole punched straight through the waterproof membrane you worked so hard to make continuous. Done carelessly, those fixing points are the ideal route for water to track behind the tiles and, eventually, into the structure.
Sealing the fixings back to the tank
We plan the bracket positions before tanking wherever we can, and we seal every penetration back to the waterproof layer as we make it — so the fixing is watertight at the membrane, not just at the tile surface. The bracket bolts into solid backing behind the board, not into a hollow, so the panel is genuinely rigid and there’s no flex to work the seal loose over time. It’s a small, painstaking bit of work that most people will never see or think about — which is the whole idea.
A rigid panel is a dry panel
Glass that wobbles when you lean a hand on it puts stress on its fixings every single day, and that movement is what eventually breaks a seal. So we fix into proper backing, use the right number of brackets for the size of the pane, and finish with a clean line of quality sanitary silicone where the glass meets the wall and floor. The result feels solid, stays sealed, and keeps the water where it belongs.
If you’re adding a screen as part of a wider tiling and flooring project, the wall build-up and tile choice interact with how the glass is fixed — our bathroom tiling and flooring page covers the surfaces the screen fixes into, and how they’re detailed around it.
Cleaning, limescale and what a screen costs
One of the quiet pleasures of a fixed wet room screen is how little it asks of you. With no track, no hinge and no folding door, there’s less to clean than any enclosure — but in a hard-water home glass will show limescale if you let it.
Keeping the glass clear
- Keep a squeegee in the room and pull it down the glass after showering — thirty seconds that stops limescale ever building up.
- An occasional wipe with a proper glass cleaner keeps it sparkling; avoid abrasive pads that scratch.
- A protective coating can be applied to the glass so water beads and runs off rather than clinging — worth it in harder-water areas.
- Because there’s no frame or track, there’s no hidden channel for grime and mould to hide in — what you see is all there is to clean.
What drives the cost
A screen is usually a modest part of the overall wet room budget, but a few things move the number. Frameless panels cost more than framed because the glass is thicker and the fixings more involved. Low-iron glass is an upgrade over standard. Bigger panels, a hinged return, and designer bracket finishes all add a little. As a whole, a wet room in Plymouth runs about £5,545–£10,810, and the glass sits within that. For the full picture of what shapes a bathroom budget locally, see our guide to bathroom costs in Plymouth.
A screen and a heated floor make a lovely pairing, too: the glass keeps the room dry and the warmth helps everything dry faster after use. If that appeals, our wet room underfloor heating guide explains how it works. And if you’re still weighing a full wet room against a simpler enclosure, our walk-in showers hub is a useful comparison.
Wet room screen FAQs
Do I need a screen in a wet room?
You don’t strictly need one, because the whole floor is waterproof and drains to the fall. But almost everyone fits a single fixed glass panel, because it keeps spray off the WC, basin and towels and keeps the rest of the room dry and pleasant to use. It’s the small addition that makes a wet room comfortable to live with day to day.
Is wet room glass safe?
Yes. Every screen we fit is toughened safety glass as standard — several times stronger than ordinary glass, and designed to crumble into small blunt granules rather than sharp shards in the rare event it breaks. It’s typically 8mm or 10mm depending on the panel size, and it’s fixed into solid backing so it stays rigid and secure.
What’s the difference between frameless and framed screens?
A frameless screen is a single pane held by discreet brackets, giving the cleanest, most open look with almost nothing to clean — but it uses thicker glass and costs more. A framed or semi-framed screen has a slim metal surround that adds rigidity, so it can use a slightly thinner, more affordable pane and can be colour-matched to your brassware.
Is low-iron glass worth it?
On a larger panel, most people think so. Standard glass has a faint green tint that’s most obvious at the edges; low-iron glass removes most of it, so the glass reads as genuinely clear and shows the true colour of your tiles. It’s an upgrade over standard glass rather than a necessity — we’ll give you the honest trade-off against the cost.
How do you stop the screen fixings leaking through the tanking?
Carefully. Every fixing is a hole through the waterproof membrane, so we plan bracket positions before tanking where we can and seal each penetration back to the tank as we make it — watertight at the membrane, not just the tile. The brackets bolt into solid backing so the panel stays rigid, because a screen that flexes is what eventually works a seal loose.
How do I keep the glass free of limescale?
Keep a squeegee in the room and pull it down the glass after each shower — that alone stops limescale building up. An occasional wipe with glass cleaner keeps it clear, and a protective coating that makes water bead and run off is worth considering in harder-water areas. With no frame or track, there’s no hidden channel for grime to hide in.
Proud of every bathroom we fit
Get the glass right in your wet room
Tell us how you use the room and the look you’re after. We’ll advise on frameless versus framed, whether low-iron is worth it, and exactly where the screen should sit — then fix it safely into a properly tanked wall and put it all on one clear written quote as part of your wet room installation.