
Bathroom tiling & flooring, done right
Tiling is the finish everyone sees and the bit they remember — but it’s only ever as good as the prep underneath it and the setting-out behind it. A well-tiled bathroom looks effortless precisely because the hard work is hidden: a sound, primed substrate; movement allowed for; tanking behind the wet areas; and grout lines that run dead straight from one wall to the next. We tile bathrooms across Plymouth, Plympton, Plymstock and the wider South West — walls and floors, porcelain to natural stone, on one fixed written quote.
Why tiling is the finish that makes the room
You can spend a fortune on a suite, a designer shower valve and a beautiful basin, and still end up with a bathroom that feels cheap — if the tiling lets it down. The opposite is true too: a modest suite set against crisp, well-laid tiling reads as a considered, quality room. Tiling covers more surface than anything else in a bathroom, it catches the light, and it’s the surface your eye runs along when you walk in. It is, in the most literal sense, the finish.
It’s also the part of a bathroom that’s least forgiving of corner-cutting. A wonky suite can be re-set in an afternoon; bad tiling means chipping the lot off and starting again. Every flaw in tiling is permanent and visible from across the room — a grout line that drifts, a tile that sits proud of its neighbour, a cut that lands awkwardly in a corner. Get the tiling right and the room looks after itself for fifteen or twenty years. Get it wrong and it nags at you every single day.
That’s why we treat tiling as a craft rather than a quick cover-up. The visible skill — straight lines, tight joints, tidy cuts around obstacles — rests entirely on the invisible work: the preparation of what’s underneath. Most tiling problems aren’t really tiling problems at all. They’re prep problems wearing a tiled face.
Substrate prep — the work that decides everything
If tiling is the part you see, the substrate is the part that decides whether it lasts. A tile is a rigid, brittle thing bonded to a surface; if that surface moves, flexes, absorbs water or isn’t flat, the tiling above it cracks, debonds or grins through with hairline grout failures. The vast majority of “bad tiling” we’re called to put right started with prep that was skipped or rushed.
What a sound substrate needs
- Flatness. Tiles can’t bridge a bumpy wall or floor without lippage — one edge sitting proud of the next. We check with a long level and skim, pack or float surfaces flat before a single tile goes on.
- Stability. The surface mustn’t flex. Floors are stiffened and decoupled where needed; old plaster that’s blown or hollow comes off rather than getting tiled over.
- The right board behind wet areas. Standard plasterboard isn’t made to take repeated wetting. Behind showers and baths we fit tile backer board — a cement-based or foam waterproof board that won’t soften, swell or feed mould.
- A primed, keyed surface. Dusty, porous or very smooth surfaces are primed so the adhesive grabs properly instead of letting go in a year or two.

Why priming and movement matter
Priming sounds like a detail, but it’s the difference between adhesive that holds for decades and adhesive that lets go. A primer seals porous backgrounds so they don’t suck the water out of the adhesive before it can cure, and it gives smooth surfaces a key to bond to. We prime as a matter of routine, not as an optional extra.
Movement is the other quiet killer. Buildings move — timber floors deflect underfoot, materials expand and contract with heat from underfloor heating, and new screeds shrink as they dry. Rigid tiling laid with no allowance for that movement cracks along the line of stress. We design it out: flexible adhesives and grouts on floors, decoupling mats where a floor is prone to movement, and proper movement and perimeter joints filled with flexible silicone rather than rigid grout. It’s the unglamorous engineering that keeps grout from cracking two winters down the line.
Waterproofing & tanking behind wet areas
Here’s a fact that surprises a lot of people: tiles and grout are not waterproof. They shed most of the water, but grout is mildly porous and, given years of daily showering, moisture works its way through the joints. In a splash zone that’s fine. Behind a shower or a bath — where water hits the same patch of wall thousands of times a year — it isn’t. The surface needs a waterproof layer behind the tiles to catch what gets through.
What tanking is, and where it goes
Tanking is a continuous waterproof membrane applied to the substrate before tiling, in the areas that get genuinely wet — shower enclosures, the wall behind a bath, and the whole floor and lower walls of a wet room. It’s applied as a flexible paint-on coating in two or more coats, or as bonded waterproof boards and matting, with reinforcing tape worked into every internal corner and around every pipe.
The tiles are the raincoat; the tanking is the skin underneath. Done right, you never see it and never think about it. Skipped — which is depressingly common on quick jobs — and the first sign of trouble is a damp patch, a musty smell, or a brown stain on the ceiling below.
Where it matters most
- Shower walls and floor. The most heavily and repeatedly wetted surfaces in any bathroom — always tanked.
- Behind the bath, where there’s a shower over it. A shower-bath wall takes far more water than people assume.
- Wet rooms. The entire wet zone, floor and walls, gets a full tanking system — non-negotiable.
- Niches and benches. Recessed shelves are a classic leak point; we tank them fully before tiling.
For the full detail on full-room waterproofing, see our wet room installation page.
Wall tiling vs floor tiling — they’re not the same job
People talk about “tiling” as one thing, but walls and floors are genuinely different disciplines with different demands. A good tiler chooses the right tile, adhesive and approach for each.
Wall tiling
Walls are about looks and water resistance more than toughness — nobody walks on them. You can use thinner, lighter, glossier and more decorative tiles: gloss ceramics, metro tiles, patterned and feature tiles, big calm porcelain panels. The skill is in the setting-out — getting the courses level, the verticals plumb, the cuts balanced at each end of a wall, and the joints around the basin, niche and window neat. Gloss finishes are fine here because slip resistance doesn’t apply to a wall.
Floor tiling
Floors have to take weight, wear and water underfoot, so they need denser, tougher tiles — porcelain or a hard-wearing stone — bonded with flexible adhesive over a stable, often decoupled base. Critically, a bathroom floor tile must be slip-resistant when wet, which rules out the glossy tiles you’d happily use on a wall. Floor tiling is less about decoration and more about durability, grip and a dead-flat, lippage-free finish you can keep clean.
A common, elegant approach in Plymouth bathrooms is a large-format porcelain on the floor for grip and easy cleaning, with a complementary or contrasting wall tile — a patterned feature behind the basin, say, or a metro brick-bond in the shower. We’ll help you choose a combination that works as a room, not just as two separate tile choices.
Tile types & formats — choosing the right one
The tile aisle is overwhelming, so here’s how we actually talk it through with customers. The material decides durability and upkeep; the format decides the look and how the room feels.
Porcelain
Our go-to for bathrooms. Denser and less porous than ceramic, so it’s tough, water-resistant and ideal for floors. Available in textured slip-rated finishes for floors and beautiful large-format panels for walls. Costs a little more than ceramic and is harder to cut — but it’s the most reliable all-rounder.
Ceramic
Softer and more affordable, easy to cut, with a huge range of colours and patterns. Perfect for walls and lighter-use areas. Glazed ceramic isn’t generally tough or grippy enough for a bathroom floor, but for walls it’s excellent value.
Natural stone
Marble, travertine, slate, limestone — genuinely beautiful and one-of-a-kind. The trade-off is that stone is porous, so it needs sealing on installation and re-sealing over time, and it’s softer than porcelain. Gorgeous if you’ll look after it; we’ll be honest about the upkeep.
Large-format
Big tiles (600x600mm and well beyond) mean fewer grout lines, a calmer, more seamless look and an easier-to-clean surface. They demand a very flat substrate and skilled laying to avoid lippage — exactly where good prep earns its keep.
Mosaic
Small tiles on mesh sheets — perfect for shower floors (they bend around the falls to a drain and the extra grout adds grip), feature strips and curved surfaces. More grout to keep clean, but unbeatable for detail and traction underfoot.
Metro, brick-bond & patterned
Classic rectangular metro tiles laid in a brick or herringbone bond, encaustic-look patterned tiles, hexagons — the decorative end. Brilliant for a feature wall or a characterful floor. Patterned layouts take more setting-out time to get the repeat landing neatly.
Slip resistance — what R-ratings mean for floors
A bathroom floor gets wet, and a wet floor is exactly where slips happen — so floor tiles are rated for grip. The most common measure you’ll see is the R-rating (R9 to R13), from a ramp test that grades how much slope a surface can take before you’d slide. Higher number, more grip.
A quick guide to R-values
- R9 — low slip resistance. Fine for dry areas; we’d avoid it on a bathroom floor.
- R10 — a sensible minimum for a domestic bathroom floor. Good grip without feeling rough.
- R11 — our usual recommendation for shower areas and wet rooms, where the floor is wet most often.
- R12–R13 — high grip, more textured underfoot; great for wet rooms and level-access showers, slightly more effort to keep spotless.
Getting the balance right
There’s a trade-off: the grippier a tile, the more texture it has, and the more texture, the more it holds dirt and takes a little more cleaning. The trick is matching grip to use. A family bathroom floor is well served by R10; a walk-in shower or wet room floor wants R11 or above. Smaller-format tiles and mosaics also add grip through extra grout lines, which is partly why they suit shower floors.
What we won’t do is put a glossy, low-rated tile on a floor because it looks nice on a wall. Slip resistance is one of those things you never notice until the day it matters.
Setting-out, levels and neat lines
This is the part that separates a tiler from someone who sticks tiles on a wall. Setting-out is the planning that happens before any adhesive is mixed — deciding exactly where the first tile lands so that the whole layout falls neatly across the room. Done well, you barely notice it. Done badly, you get a sliver of a cut tile in the most visible corner and a course that runs uphill across the wall.
What good setting-out looks for
- Balanced cuts. We avoid thin slivers at the ends of walls by centring the layout so cuts at each side are even and generous.
- Level datum lines. Tiling starts from a dead-level batten or laser line, not the floor or skirting — which are rarely level in an older Plymouth home.
- Plumb verticals. Joints run truly vertical so the eye reads the wall as square, even when the room isn’t.
- Sensible cut placement. Awkward cuts get planned into less visible corners, and full tiles land where you’ll see them most.
- Features lined up. Niches, the basin, the window and the floor-to-wall joints all relate to the grid rather than fighting it.

Grout and sealant lines
Consistent grout joints — even width, straight runs, properly packed and cleanly finished — are what make tiling look professional. We use spacers and battens to hold the grid true, then grout in a colour chosen to suit the look (more on that below). Where one plane meets another — wall-to-floor, internal corners, around the bath and basin — we use flexible silicone sealant rather than grout, because those joints move and rigid grout would crack. A neat, unbroken silicone line at the right places is a quiet hallmark of a job done by someone who cares.
Can you tile over old tiles?
It’s one of the most common questions we get, and the honest answer is: sometimes — but usually it’s a false economy. Tiling over existing tiles is possible in the right circumstances, and we’ll do it where it genuinely makes sense, but it’s not the shortcut it first appears.
When tiling over can work
- The existing tiles are firmly bonded with no hollow, drummy or loose areas (we tap-test the lot).
- The old surface is flat and sound with no cracks or movement underneath.
- There’s room in the layout for the extra thickness at the floor, around the bath and at door reveals.
- The old glaze is keyed and primed with the right bonding primer so the new adhesive grips.
When we’d say strip them off
- Any tiles are loose, cracked or hollow — you’d be tiling onto a fault.
- You can’t verify what’s behind them (no tanking, tired plasterboard, damp).
- The build-up would foul the bath edge, the floor level or the door.
- It’s a shower or wet area that really needs tanking done properly first.
Our default for a proper bathroom renovation is to strip back to a sound substrate, deal with any waterproofing, and tile onto a known-good surface. It costs a little more up front and removes the single biggest cause of tiling failure: building beautiful new work on top of an old problem you can’t see.
LVT, vinyl & waterproof flooring alternatives
Tile is the classic bathroom floor, but it isn’t the only good answer — and we fit waterproof alternatives just as happily where they suit the room and the budget.
Luxury vinyl tile (LVT)
LVT is a tough, waterproof vinyl plank or tile that convincingly mimics wood or stone. It’s warmer and softer underfoot than tile, naturally slip-resistant, quick to lay and very forgiving on a busy family bathroom. A genuinely good-value, comfortable floor — especially over underfloor heating.
Sheet vinyl
Modern sheet vinyl is fully waterproof with very few or no seams, which makes it excellent for accessible and family bathrooms where you want zero water ingress and easy cleaning. Cushioned underfoot and budget-friendly. Less premium-feeling than tile or LVT, but practical and safe.
When we’d suggest them
Tight budgets, accessibility, a warmer floor, or a room where you’d rather not have grout lines to clean. We’ll talk you through the trade-offs honestly — tile still wins on longevity and resale feel, but the right vinyl floor can be the smarter choice for how you actually live.
Underfloor heating under tile
A tiled floor can feel cold underfoot first thing in the morning, which is exactly why electric underfloor heating is one of our most popular tiling add-ons. A thin heating mat sits in the adhesive bed beneath the tiles, takes the chill off, dries the floor quickly after a shower, and warms the whole room gently from the ground up. Tile is the ideal partner for it because it conducts and holds heat so well.
The golden rule: fit it while the floor’s open. Installing underfloor heating during a tiling job adds modest cost; retrofitting it later means lifting the floor you just paid for. We use flexible, heat-rated adhesives and grouts designed for the expansion and contraction that warm floors go through, so the tiling moves with the heat instead of cracking against it. The thermostat and any electrical connection are wired and certified to current regulations as part of the job.
Grout colour & keeping it looking new
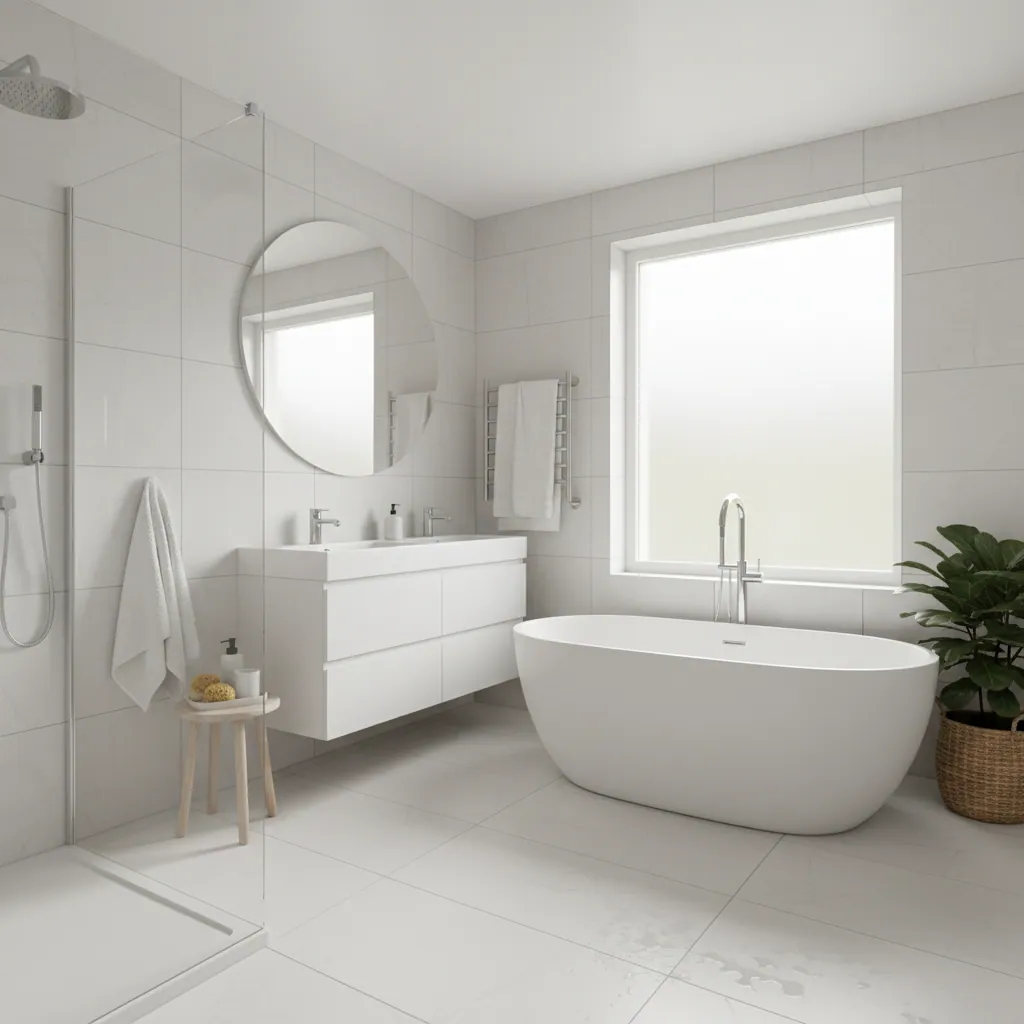
Grout colour is a small decision with a big effect, and it’s worth a minute’s thought rather than defaulting to white. The right choice can make a layout sing or quietly disappear, and it changes how much cleaning you sign up for.
Choosing a colour
- Matching grout (close to the tile colour) calms the look and makes a wall read as one seamless surface — ideal with large-format tiles.
- Contrasting grout (e.g. dark grout with metro tiles) deliberately shows off the pattern and the brick-bond geometry — bang on trend, but commit to it.
- Grey over brilliant white on floors and shower areas is the practical sweet spot — it looks crisp but doesn’t show every speck the way pure white does.
Keeping grout clean
We use quality, water-resistant grout and finish the joints properly, which is the biggest factor in how grout ages. Beyond that, a few habits keep it fresh: run the extractor to cut down on the damp that feeds mould, wipe shower walls down after use, and avoid harsh acidic cleaners that wear grout away. Where the look or longevity warrants it, we can specify an epoxy or premium grout that’s far more stain- and water-resistant — pricier and more skilled to lay, but close to maintenance-free.
How we tile a bathroom, step by step
Here’s exactly how a tiling job runs, so you know what’s happening in your home each day and why each stage takes the time it does.
1. Survey & choose
We measure up, talk through tile material, format and grout colour, work out quantities (with a sensible allowance for cuts and breakages), and agree the layout. You get one fixed written quote covering materials and labour.
2. Prepare the substrate
Old finishes come off, surfaces are made flat and stable, tile backer board goes up behind wet areas, floors are stiffened or decoupled where needed, and everything is primed. This is the stage that decides how long the tiling lasts.
3. Tank the wet areas
Showers, the wall behind a shower-bath and any niches get a continuous waterproof membrane with reinforced corners, before any tile goes on. The hidden layer that stops leaks for the life of the room.
4. Set out
We plan the layout off level datum lines, balance the cuts, and mark the grid so the first tile lands in the right place. A dry lay confirms how patterned or large-format tiles will fall before anything is fixed.
5. Fix the tiles
Tiles are bedded in the right adhesive — flexible on floors, with full coverage behind every tile so there are no hollow spots. Spacers and levelling clips hold the joints even and the surface flat to avoid lippage.
6. Cut & detail
Neat cuts around the basin, pipes, sockets, the window and the niche; trims or mitred edges finish external corners cleanly. This fiddly stage is where a careful tiler shows.
7. Grout
Once the adhesive has cured, joints are grouted in your chosen colour, packed fully and finished smooth, then the tiles are cleaned off before any haze sets. Movement joints are left for silicone.
8. Seal, silicone & clean
Flexible silicone goes into the wall-to-floor and perimeter joints, natural stone is sealed if used, and the room gets a final clean. We walk you round it and leave care notes.
A typical bathroom tiling job runs 2–5 working days on site. The biggest variables are the amount of prep, the tile format (large-format and patterned layouts take longer), and the curing time between fixing and grouting — which we won’t rush, because grouting too soon is a classic cause of trouble later.
What bathroom tiling costs in Plymouth
Tiling is usually priced per square metre of labour, plus the cost of the tiles and materials. As a guide, tiling alone typically runs £800–£3,500 for a bathroom locally — and because Plymouth sits roughly 9% below the national average on fitting costs, our labour tends to come in a touch under what you’d pay up-country. We put it all on one fixed written quote, not a creeping day rate.
| Job | Typical Plymouth cost | What’s involved |
|---|---|---|
| Small / part-tiled splashbacks, shower wall, floor |
£800–£1,500 | Prep, a wet-area tank, mid-range porcelain or ceramic, neat grouting and sealant. |
| Standard fully-tiled full bathroom, floor & walls |
£1,500–£2,600 | Full prep, tanking, quality porcelain, balanced setting-out, trims and silicone. |
| Premium / complex large-format, stone, patterned |
£2,600–£3,500 | Large-format or natural stone, herringbone or patterned layouts, underfloor heating, epoxy grout. |
What drives the price up
- Large-format and natural-stone tiles — more cost, more skilled, slower to lay.
- Patterned layouts (herringbone, mosaics, feature walls) that take careful setting-out.
- Extra prep: stripping old tiles, re-boarding, levelling a bad floor.
- Underfloor heating and epoxy/premium grout.
- Hidden surprises uncovered at strip-out — damp, rot or blown plaster.
What keeps it down
- Mid-range porcelain or ceramic over premium stone.
- Standard tile formats in a simple, square layout.
- A sound substrate that needs minimal prep.
- Part-tiling (splashbacks and the wet zone) rather than full walls.
- Choosing LVT or sheet vinyl on the floor where it suits.
For a full breakdown, see our guide to how much bathroom tiling costs and the wider cost of a bathroom in Plymouth. If you’re tiling as part of a bigger project, it’s usually folded into the price of a full bathroom installation.
Common tiling pitfalls — and how we avoid them
We’re called out to put right other people’s tiling often enough to know exactly where it goes wrong. Here are the classics, and how we head them off.
Lippage
The mistake: tile edges sitting proud of their neighbours, catching the light and the toe.
How we avoid it: a dead-flat substrate, full adhesive coverage and levelling clips so every tile sits in plane.
Poor prep
The mistake: tiling onto dusty, unprimed, uneven or unstable surfaces, so the tiling lets go or cracks.
How we avoid it: we never skip prep — flat, stable, primed, and the right board behind wet areas.
Cracked grout
The mistake: rigid grout in joints that move, so it cracks and lets water in.
How we avoid it: flexible grout, decoupling where needed, and silicone — not grout — in every movement joint.
Drifting lines & bad cuts
The mistake: courses that run uphill and thin slivers in the most visible corner.
How we avoid it: proper setting-out off level datums, balanced cuts and a dry lay before anything’s fixed.
Hollow tiles
The mistake: dabs of adhesive leaving voids behind the tile, so it sounds hollow and cracks under load.
How we avoid it: solid-bed fixing with full coverage, especially on floors.
No tanking
The mistake: relying on tiles and grout to keep water out of a shower.
How we avoid it: a full waterproof tank behind every wet area before a single tile goes up.
Bathroom tiling & flooring FAQs
How much does bathroom tiling cost in Plymouth?
Bathroom tiling alone typically costs £800–£3,500 in Plymouth, depending on the size of the room, the tiles you choose and how much preparation is needed. A small part-tiled job starts around £800, a standard fully-tiled bathroom runs £1,500–£2,600, and premium large-format, natural-stone or patterned tiling reaches £3,500. Because Plymouth sits around 9% below the UK average on fitting costs, local labour comes in a touch under national rates, and we quote it all as one fixed written price.
Can you tile over old tiles?
Sometimes, but it’s usually a false economy. Tiling over existing tiles can work if the old tiles are firmly bonded with no hollow or loose areas, the surface is flat and sound, there’s room for the extra thickness, and the old glaze is keyed and primed first. We’d recommend stripping them off if any are loose or cracked, if you can’t verify what’s behind them, if the build-up would foul the bath or door, or if it’s a wet area that needs tanking done properly. Our default for a proper renovation is to tile onto a known-good substrate.
What tiles are best for bathroom floors?
Porcelain is the best all-round choice for a bathroom floor — it’s dense, hard-wearing and water-resistant, and it comes in textured, slip-rated finishes. For grip, look for at least an R10 rating in a family bathroom and R11 or above in a shower or wet room. Natural stone is beautiful but porous and needs sealing, while glossy ceramic and polished tiles are best kept for walls where slip resistance doesn’t apply. Smaller-format tiles and mosaics also add grip through extra grout lines.
How long does bathroom tiling take?
A typical bathroom tiling job takes 2–5 working days on site. The time depends on how much preparation the substrate needs, the tile format (large-format and patterned layouts take longer to set out and cut) and the curing time between fixing the tiles and grouting them, which can’t be rushed without risking problems later.
What’s the difference between porcelain and ceramic tiles?
Both are fired clay, but porcelain is fired denser and harder, so it absorbs less water and is tougher — which makes it ideal for bathroom floors and wet areas. Ceramic is softer, cheaper and easier to cut, with a huge range of colours and patterns, and it’s excellent value for walls. As a rule we use porcelain on floors and in wet areas, and ceramic or porcelain on walls depending on the look and budget.
Do you fit underfloor heating under tiles?
Yes, and it’s one of our most popular add-ons. A thin electric heating mat sits in the adhesive bed beneath the tiles, takes the chill off the floor, warms the room and helps it dry after a shower. Tile is the ideal surface for it because it conducts and holds heat well. It’s far easier and cheaper to fit while the floor is open during a tiling job than to retrofit later, and we use flexible, heat-rated adhesives and grouts plus a certified electrical connection.
Why does grout crack, and how do you prevent it?
Grout cracks when the surface beneath it moves — a flexing timber floor, a shrinking new screed, or heat expansion from underfloor heating — and rigid grout can’t cope. We prevent it by using flexible adhesives and grouts, decoupling floors that are prone to movement, and crucially by filling movement joints (wall-to-floor, internal corners, around the bath) with flexible silicone rather than grout, because those joints are designed to move.
Do bathroom tiles need waterproofing behind them?
Wet areas do. Tiles and grout shed most water but aren’t fully waterproof — grout is mildly porous, so over years of showering moisture works through the joints. That’s why we tank (apply a continuous waterproof membrane to) shower enclosures, the wall behind a shower-bath, niches, and the whole wet zone of a wet room before tiling. Splashback areas that only get the odd splash don’t need a full tank.
What is the best grout colour for a bathroom?
It depends on the look you want and how much cleaning you’ll do. Matching grout calms a wall and makes large-format tiles read as one seamless surface; contrasting grout (like dark grout with metro tiles) deliberately shows off the pattern. On floors and in showers, a grey rather than brilliant white is the practical sweet spot — it looks crisp but doesn’t show every speck. For near maintenance-free joints we can specify epoxy or premium grout.
Is LVT or vinyl a good alternative to tiles in a bathroom?
Yes, in the right room. Luxury vinyl tile (LVT) is tough, fully waterproof, warmer and softer underfoot than tile, naturally slip-resistant and quick to lay — a great-value, comfortable floor, especially over underfloor heating. Sheet vinyl is fully waterproof with few or no seams, ideal for accessible and family bathrooms. Tile still wins on longevity and resale feel, but a good vinyl floor can be the smarter choice for budget, warmth, accessibility or avoiding grout lines.
Why is substrate preparation so important for tiling?
Because most tiling failures are really prep failures. A tile is rigid and brittle, so if the surface beneath it isn’t flat, stable, dry and properly primed, the tiling cracks, debonds or develops hollow spots. Good prep means flattening the surface, making it stable, fitting waterproof tile backer board behind wet areas, and priming porous or smooth backgrounds so the adhesive bonds for decades. The visible quality of tiling rests entirely on this invisible work.
What does the R-rating on floor tiles mean?
The R-rating (R9 to R13) measures a floor tile’s slip resistance from a ramp test — the higher the number, the more grip when wet. For a bathroom floor we’d recommend at least R10, R11 or above for shower areas and wet rooms, and R12–R13 for high-grip level-access wet rooms. The trade-off is that grippier tiles are more textured and hold a little more dirt, so we match the rating to how the floor is used rather than just picking the highest number.
Can you tile a wet room floor so it isn’t slippery?
Yes. We specify slip-resistant floor tiles for wet rooms — typically R11 or above, or textured porcelain — and often use smaller-format tiles or mosaics, which add grip through extra grout lines and bend neatly around the floor’s fall to the drain. Glossy tiles are kept for the walls where slip resistance doesn’t matter. Done this way, a wet room floor has reliable grip even when it’s wet.
Bathroom tiling across Plymouth & the South West
We tile bathrooms throughout Plymouth and the surrounding South West. Find your area below, or browse the full areas we cover and our wider bathroom services.
Recent work
Bathrooms we’ve fitted around Plymouth
A few recent installations — real finishes from across Plymouth and the South West.


Proud of every bathroom we fit
Get a fixed price for your tiling & flooring
Tell us about the room and the look you’re after. We’ll visit, check the substrate and the wet areas, talk through tiles, formats and grout, and give you one clear written quote — prepped properly, set out true, finished neat. No surprises, no pressure.