What a low-level shower tray actually is
A low-level tray gives you that clean, contemporary walk-in look without the upheaval of digging into your floor — and when it is set dead level by a Plymouth fitter who does this every week, it drains fast, feels solid underfoot and lasts for decades.
The phrase “low-level” (you will also hear “low-profile” or “slimline”) simply describes a shower tray that sits very close to the finished floor rather than perching on tall legs like the trays of twenty years ago. A modern low-profile tray typically sits somewhere between 25mm and 45mm proud of your finished floor. That slim step is barely noticeable, easy to walk over, and gives the whole shower a built-in, flush-with-the-room feel that suits both period homes in Peverell and new-builds out towards Derriford.
It matters because the tray is the single most important component in a walk-in shower. Get the fall, the bedding and the waste right and everything above it — the screen, the tiling, the valve — behaves for years. Get the tray wrong and no amount of pretty glass will save you from puddling, movement or a slow, gurgling drain. We treat the tray as the foundation of the job, not an afterthought, and we set every one of them to a checked, measured fall so water always goes where it should.
There is a related option people often confuse with a low-level tray: the fully recessed, level-access former, where there is no step at all and the shower floor sits flush with the rest of the bathroom. Both give a sleek result, but they are built very differently and suit different homes. We will walk through the honest trade-offs between the two further down, because choosing correctly at the start saves money and regret later.
Why the tray choice sets the tone for the whole shower
A shower tray does three quiet jobs at once. It catches every drop of water, it channels that water to a single waste, and it protects the structure underneath from ever getting wet. A good low-level tray does all three while looking like it was always meant to be there. That is the standard we build to on every bathroom across Plymouth, from Plymstock terraces to family homes in St Budeaux.
The low-profile look became popular for a simple reason: it reads as calm and modern. A tall tray with a chunky upstand shouts “shower cubicle.” A slim tray that sits almost flush with your tiled floor reads as a considered, spa-like space. It also makes the shower easier and safer to step into, which matters as much for a young family as it does for anyone thinking ahead to later life.
Slim step, big difference underfoot
Because a low-level tray sits so close to the floor, the transition into the shower is gentle. There is no awkward high lip to clear, which reduces trip risk and makes cleaning simpler — you are not fishing a mop around a raised platform. If you want to eliminate the step entirely, that is where a level-access former or a full wet room installation comes in, and for genuine step-free bathing we would point you towards our work on accessible bathrooms. For most homes, though, a well-set low-profile tray strikes the ideal balance between modern looks, easy fitting and sensible cost.
How it fits with the rest of the room
The tray never works alone. Its footprint drives the glass you can use, so it pays to read our guide to walk-in shower sizes and dimensions alongside this page. The surface you choose affects long-term upkeep, which we cover in walk-in shower maintenance. And the way the tray meets the wall dictates how your tiling and any recessed shelving land, which we detail in shower tiling and niches. We plan all of these together at survey so nothing is left to chance on fitting day.
Materials and options: what your tray is made of
Not all trays are created equal, and the material you choose changes how the tray feels, how it wears and how it can be fitted. Here are the three families we fit most often across Plymouth, with a plain-spoken word on each.
Stone resin
Our workhorse recommendation. Stone resin trays are dense, tough and reassuringly warm underfoot, with anti-slip textured surfaces available on most ranges. They resist flexing, take a knock without cracking and hold a dead-level set beautifully. For the majority of walk-in showers, this is the material we reach for first.
Acrylic (reinforced)
Lighter and generally kinder on the budget. A quality acrylic tray backed with a resin or timber core performs well, but cheaper unsupported trays can flex and creak. If you like acrylic, we specify a properly reinforced one and bed it fully so it feels solid, not springy, when you stand on it.
Mineral / composite
The premium, design-led option. Mineral and composite trays offer ultra-slim profiles, matt colours beyond plain white, and many can be cut to fit an awkward alcove. They feel superb, though they sit at the top end for cost. Ideal when the shower is the centrepiece of the room.
Low-level tray versus level-access former — the honest comparison
This is the decision that trips most people up, so here is the plain version side by side.
| Low-level tray | Level-access former | |
|---|---|---|
| Height above floor | Sits ~25–45mm proud — a slim, easy step | Recesses flush — no step at all |
| Waterproofing | Tray is the waterproof layer; simple to seal | Needs full tanking / waterproofing around the former |
| Floor works | Sits on top of the floor; minimal disruption | Floor is cut into or built up to bury the former |
| Best for | Most bathrooms wanting a modern, tidy result | Step-free access, wet rooms, future-proofing |
| Relative cost | Lower — faster to fit | Higher — more preparation and tanking |
Neither is “better” in the abstract; they solve different problems. If you want the cleanest modern shower with the least fuss, a low-level tray usually wins. If you need true step-free bathing or you are building a wet room, the former earns its extra cost. We will tell you honestly which one your room and budget point to.
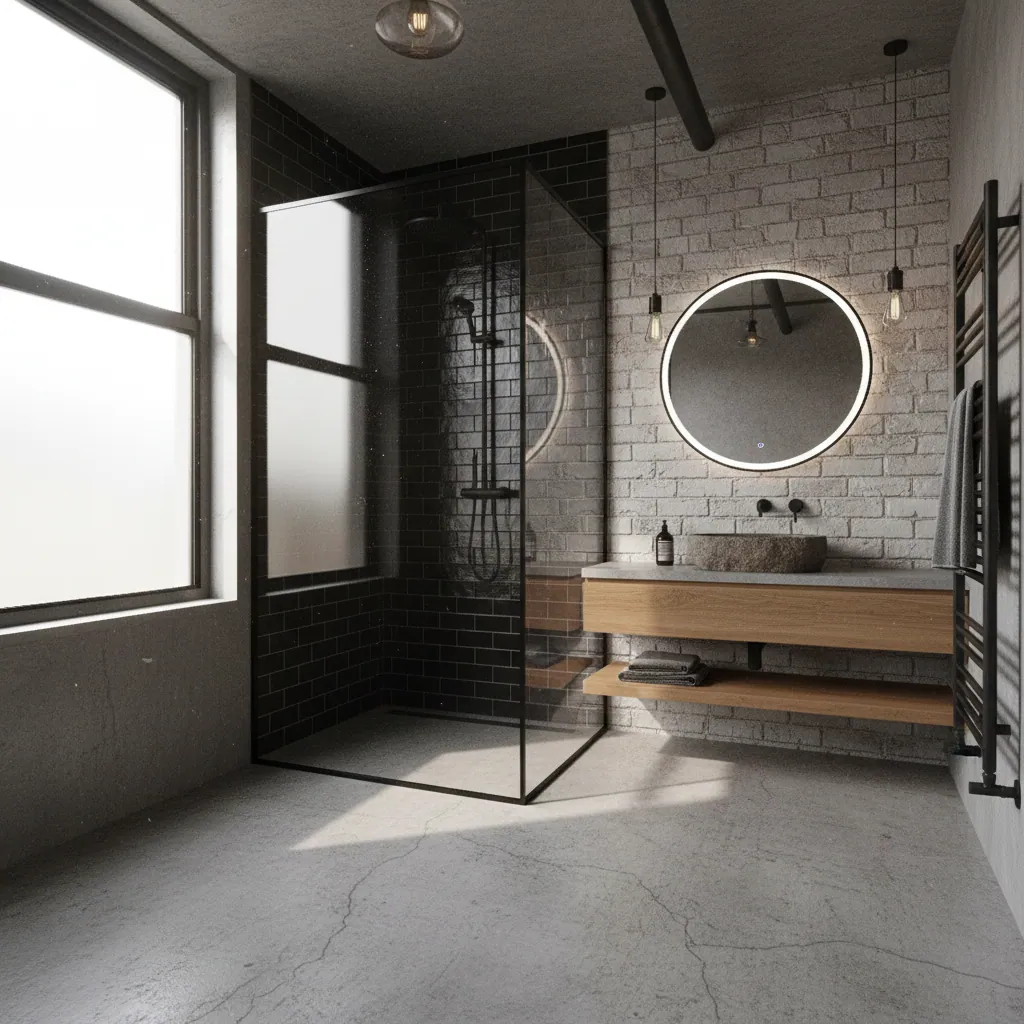
Sizes, shapes and cutting to fit
Low-level trays come in a wide spread of sizes. Common lengths run 1200, 1400, 1600 and 1700mm, with widths from 700 up to 900mm, plus square and quadrant shapes for corners. On many stone resin and composite ranges the tray can be cut to fit, which is a genuine advantage in older Plymouth homes where walls are rarely square. We measure the opening precisely, choose a tray that fills it neatly, and where the product allows, trim it for a snug, gap-free result. For a deeper look at footprints and clearances, see our sizes and dimensions guide.
How we fit a low-level tray, step by step
Here is exactly how our fitters set a low-level tray so it drains fast and feels rock solid. No shortcuts, no fudged falls — just the method that has served Plymouth homes for years.
1. Survey and set out
We measure the opening, check the floor for level and movement, and confirm the tray size, waste position and drainage run before a single tool comes out. Timber or solid floor, we plan the fall at this stage.
2. Prepare the floor
On a solid floor we make sure the base is sound, clean and flat. On a timber floor we stiffen and pack out any spring, because a tray is only ever as steady as what sits beneath it.
3. Set the waste and drainage
We fit the waste and connect the drainage run first, testing the fall so water carries away briskly. A fast, quiet waste is the difference between a shower that drains and one that pools.
4. Bed the tray fully
We bed the tray on a full, continuous mortar or adhesive base — never on dabs alone — so there are no voids to flex, creak or crack over time. Full support is what makes a tray feel expensive.
5. Set it dead level
With the tray on its bed, we set it dead level across its face while the built-in fall in the tray carries water to the waste. We check with a long spirit level in every direction, adjusting before anything goes off.
6. Seal, test and protect
Once cured, we seal the tray to the walls, run a full water test to confirm the drainage, and protect the surface while the tiling and screen go in. Only then do we hand you a shower we are proud of.
That sequence looks simple written down, and that is the point — years of doing it right is what makes it look easy. If you would like to talk any of these steps through, get in touch with our Plymouth team and we will happily explain how we would approach your room.
Considerations and the pitfalls we design out
A tray is easy to get slightly wrong and hard to put right once it is tiled in. These are the details we sweat so you never have to think about them.
Anti-slip surfaces
A wet tray needs grip. Most stone resin trays offer a textured anti-slip finish, and where we tile a wet floor we specify tiles rated R10 to R11 for safe footing. Grip should never be an afterthought — it is designed in from the start.
Timber floor movement
Timber floors flex, and flex is the enemy of a sealed tray. We stiffen the base and support the tray fully so nothing moves, which stops the hairline cracks and failed seals that come from a bouncy floor.
Waste and drainage falls
A tray that drains slowly is almost always a fall or waste problem, not a tray fault. We size the waste, set the run and test the flow so water leaves quickly and quietly, with no standing puddle by the drain.
Sealing and the wall junction
Where the tray meets the wall is where showers most often leak. We seal that junction properly and coordinate it with your tiling and tiling and niches so water is directed onto the tray, never behind it.
Budget is the other honest consideration. A tray is one line in a bigger picture — for how the whole job adds up, our bathroom cost in Plymouth guide lays it out plainly. A typical walk-in shower runs from £2,500 to £6,500 and takes three to six working days, and because Plymouth fitting sits around 9% below the UK average, your money tends to stretch that bit further here than it would up-country.
Low-level shower tray questions, answered
How high does a low-level shower tray sit above the floor?
A modern low-profile tray typically sits between 25mm and 45mm proud of your finished floor. That is a slim, easy step to walk over — far lower than older trays — while still giving you a straightforward, reliable waterproof base without cutting into the structure below.
What is the difference between a low-level tray and a level-access former?
A low-level tray sits on top of the floor with a slim 25 to 45mm step and acts as its own waterproof layer. A level-access former is recessed into the floor so the shower is flush with the room, with no step, but it needs full tanking and more floor preparation, which makes it a bigger and pricier job.
Which tray material do you recommend?
For most Plymouth bathrooms we recommend stone resin. It is tough, warm underfoot and holds a dead-level set well, with anti-slip textured surfaces on most ranges. Reinforced acrylic suits tighter budgets, while mineral and composite trays offer the slimmest, most design-led finish at a higher cost.
Can a shower tray be cut to fit my bathroom?
On many stone resin and composite ranges, yes — the tray can be trimmed to fit. That is genuinely useful in older Plymouth homes where walls are rarely square. We measure the opening precisely and, where the product allows, cut the tray for a snug, gap-free fit against the wall.
Can a low-level tray go on a timber floor?
Yes, and we fit them on timber floors regularly. The key is stiffening and fully supporting the base so there is no spring, then bedding the tray on a continuous base rather than dabs. Done that way, the tray stays rock solid and the seals never get worked loose by movement.
How do you make sure the tray drains properly?
We set and test the waste and drainage fall before the tray goes down, bed the tray fully, then set it dead level so the tray’s built-in fall carries water to the waste. A final water test confirms it drains fast and quietly before any tiling or glass goes in.
Let’s get your walk-in shower started right
From the tray up, we build walk-in showers that drain fast, feel solid and last. Tell us about your room and we will give you a straight, no-pressure plan.